Ice Maker Supply Line Repair — Find the Leak & Fix It
Updated September 2, 2026 — Burleson, TX
Water on the floor in front of your refrigerator is one of those problems that seems obvious until you actually try to find the source. Sometimes it is the ice maker line. Sometimes it is the door seal. Sometimes it is a clogged defrost drain. We have been tracing mystery refrigerator leaks in Burleson homes since 1985, and more often than not the ice maker supply line turns out to be the culprit.
Here is how to figure out where the water is actually coming from, fix the simple things yourself, and know when to call.
First — Where Is the Water Actually Coming From?
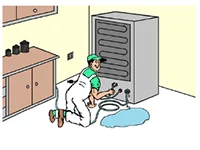
Before you replace anything, find the source. Pull the refrigerator out from the wall about a foot — carefully, they are heavy — and check these in order:
- The ice maker supply line itself. Visible behind the fridge, running from the wall to the bottom-back of the refrigerator. Look for wet spots along the line, drips at either connection, cracks or kinks, mineral buildup, or green corrosion on copper.
- The shut-off valve in the wall or floor. Usually a saddle valve or compression valve where the line taps into a cold water pipe. These leak often.
- The water inlet valve on the refrigerator. The small electric valve at the bottom-back of the fridge where the supply line connects. A failing one drips even when the ice maker is not running.
- The defrost drain. Inside the freezer, a drain tube carries water down to a drip pan. If it clogs with food debris or an ice plug, water backs up and spills out the front.
- The drip pan. At the very bottom of the fridge, sliding out from behind a kick plate. If it is cracked, water meant to evaporate ends up on the floor instead.
- The door gasket. If the seal is not tight, warm humid air gets in, condenses inside, and drips out.
Identifying which one is leaking saves you from replacing the wrong thing.
Ice Maker Supply Line — The Most Common Culprit
Once you have confirmed it is the supply line, you have three sub-problems:
- Leak at the wall valve — the saddle valve or compression valve is failing
- Leak along the line itself — pinhole, crack, or kink
- Leak at the refrigerator end — the connection at the fridge, or the inlet valve behind it
The most common by a wide margin is the wall valve, especially when it is a saddle valve. Those are known for failing within a few years and should be replaced with a proper quarter-turn ball valve whenever the tap point allows it.
DIY: Replacing an Ice Maker Supply Line
Tools you will need:
- Adjustable wrench
- New ice maker supply line (material guidance below)
- Towel and bucket
Steps:
- Shut off the water supply at the valve where the line taps into a cold water pipe — under the sink, in a nearby wall, or wherever the cold line is tapped. If there is no dedicated shutoff, close the main at the meter.
- Disconnect the line from the refrigerator. Usually a compression fitting at the bottom-back of the fridge.
- Disconnect from the wall valve. Also typically a compression fitting.
- Remove the old line from behind the fridge.
- Route the new line the same way the old one went. Leave three to four feet of slack so the fridge can be pulled out for future service.
- Connect at the wall end first. Make sure the compression nut and ferrule are properly seated, and do not overtighten.
- Connect at the refrigerator end the same way.
- Turn the water on slowly and check both connections for drips.
- Push the refrigerator back without kinking the line.
- Wait 24 hours before deciding the ice maker is not working. The first batch of ice usually takes a full day.
Water behind the refrigerator and no idea where it is coming from? Call 817-447-2654. We will find the source before anything gets replaced, and most ice maker calls are same-day.
Choose Your Line: Copper, Stainless Braided, or Plastic?
Three options, ranked best to worst:
1. Stainless steel braided supply line. Our recommendation. Flexible, durable, will not kink, resists corrosion, and lasts decades. Usually $15–$25. The clear winner for most homes.
2. Copper tubing. Traditional, durable, and rigid — which is both a pro and a con. It takes careful routing, but it will outlast the refrigerator. Usually $15–$30 depending on length.
3. Plastic polyethylene tubing. Do not use it. This is what came in cheap supply kits twenty years ago and it is still behind a lot of older refrigerators. It cracks, kinks, and develops pinhole leaks.
If your current line is white or clear plastic, that is a leak waiting to happen. Replace it before it dumps water across your kitchen floor.
New Refrigerator? Connecting the Water Line
If you have just bought a fridge with an ice maker and there is no line to it yet, the job goes like this:
- Locate a cold water line, usually under the kitchen sink
- Install a quarter-turn ball valve at the tap point — not a saddle valve, those fail
- Run a new stainless braided line from the valve to the back of the fridge
- Connect both ends, turn the water on slowly, and check for leaks
Because there is no existing tap, this one involves cutting into a live cold water line. It is honest territory for a handy homeowner with the right tools, but most folks call a plumber and the whole job usually runs under an hour.
Recent Job: New Ice Maker Line Installed in Burleson, TX
August 24, 2026 — Burleson, TX. A Burleson homeowner called us to run a water line for an ice maker. Don tapped into a cold water line, ran the new supply line to the back of the refrigerator, and checked both connections under pressure before pushing the fridge back into place. Straightforward work, and it was finished the same visit.
The part worth knowing about a job like this is that the line itself is rarely what fails first. What determines whether a new ice maker line is still dry in ten years is the tap point and the valve at it — a proper quarter-turn stop instead of a saddle valve — and enough slack behind the refrigerator that the line is not under tension every time the fridge gets moved. Those are the choices that get made in the first hour and quietly decide the next decade.
It also matters that this connection sits behind an appliance nobody moves. A slow seep back there can run for months, soaking the flooring and the cabinet bases before anyone notices a thing. That is the case for doing the connection right the first time rather than the cheapest way.
Other Refrigerator Water Sources
If the supply line checks out, look elsewhere:
- Clogged defrost drain. The tell is water pooling inside the freezer or fridge before it ever reaches the floor. Thaw the drain with hot water from a turkey baster.
- Cracked drip pan. Pull the kick plate at the bottom of the fridge. If the plastic pan is cracked, replace it through an appliance parts supplier.
- Failed door seal. Close the door on a dollar bill. If it slides out easily, the gasket is shot.
- Defrost cycle overflowing. Usually a clogged defrost drain backing up.
If none of these turn up anything, you may be looking at a failed inlet valve on the refrigerator itself. That is an appliance repair rather than a plumbing repair, and we will tell you so instead of billing you for it.
When to Call a Plumber
Give us a call if:
- The wall valve is corroded and will not come apart
- The line runs through walls or cabinets and you cannot reach both ends
- The leak is in the cold water line itself, behind the valve
- You see signs of long-term water damage in the cabinet or the flooring
- You are not comfortable working with compression fittings
- You are installing a brand-new line to a refrigerator that has never had one, which means tapping into a live cold water line
A Word From Don
If your refrigerator is leaking and you cannot pinpoint where, or you have found the leak but the connection will not come apart, give us a call at 817-447-2654. Most ice maker line repairs and new installs are same-day, and you get a free phone estimate before we head out so there are no surprises.
Related work we handle: under sink repairs, kitchen sink installation, and general plumbing repair.
Dependable Plumbing Company has served Burleson, Alvarado, Crowley, Everman, Joshua, Keene — and surrounding South DFW communities since 1985. Master License M12423.
Need a plumber? Call Don.
Same-day service on most plumbing calls · Licensed Plumber
817-447-2654