
Garbage Disposal Installation in Alvarado, TX — Case Study
Near Gateway Dr, Alvarado, TX 76009
On 11/11/2022 we drove out to Alvarado for what started as a single service call: install a new garbage disposal. When we got there, the homeowner mentioned the master bathroom toilet had been running constantly for a week or so. Could we look at that too?
Sure thing. Two jobs in one visit, no second trip charge.
New Garbage Disposal Installation
The old disposal had stopped working — hummed when the switch was flipped but didn’t spin. After 12 years of service, it was time to retire it. The average residential disposal lasts 10–15 years.
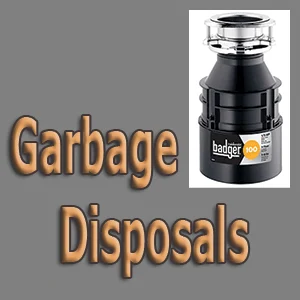
The homeowner had already bought a replacement: a 1/2 HP InSinkErator. Good quality and a good fit for an average single-family home.
Installation process:
- Cut the power at the breaker
- Disconnected the dishwasher drain hose from the old disposal’s inlet
- Disconnected the discharge tube going to the kitchen p-trap
- Disconnected the electrical from the old disposal
- Released the old disposal from the mounting ring under the sink
- Cleaned and inspected the mounting ring — reusable in this case
- Wired the new disposal to match the existing setup
- Mounted the new unit to the existing ring
- Reconnected discharge tube and dishwasher inlet
- Restored power and tested
About 45 minutes start to finish. New disposal worked perfectly.
A Note on the Mounting Ring
Most disposals use a similar mounting system (InSinkErator’s EZ Mount is the most common). If the existing mounting ring is in good condition and the new disposal uses the same system, you can reuse it. This saves time and avoids disturbing the sink flange.
If the homeowner had bought a different brand with a different mounting system (Waste King, for example), we would have had to replace the entire mounting assembly including the sink flange — a bigger job, more labor, more cost.
For disposal replacements, sticking with the same brand as the previous unit saves time and money.
The Bonus Job — Toilet Fill Valve
The master bathroom toilet had been running constantly. Not phantom flushing (intermittent refills) but actually running — water continuously trickling into the tank with no stop.
When a toilet runs continuously, it’s almost always one of two things:
- The flapper isn’t sealing at all (different from the gradual leak that causes phantom flushing)
- The fill valve is stuck open
We checked the flapper first — looked fine, sealed when pressed. So the fill valve was the culprit.
Why fill valves fail:
- Internal seals wear out
- Sediment from hard water builds up inside
- Float mechanism gets stuck or breaks
- After 10–15 years of millions of fill cycles, they just wear out
The repair — standard fill valve swap:
- Shut off water at the angle stop
- Flushed the toilet to empty the tank
- Disconnected the supply line from the bottom of the tank
- Unscrewed the old fill valve from inside the tank (one lock nut underneath)
- Installed a new universal fill valve — Fluidmaster, $15 part
- Adjusted height so the top is about 1 inch below the tank rim
- Connected refill tube to the overflow tube with the included clip
- Reconnected supply line
- Turned water on slowly, adjusted water level to about 1 inch below the overflow
- Tested — flushed several times, watched for proper fill and clean shut-off
15-minute repair. No more running toilet.
Why One Visit Often Handles Multiple Small Repairs
This is one of the things customers don’t always think about: when you have a plumber out for one job, it’s usually worth mentioning anything else that’s been bugging you. Common issues that piggyback well onto a service call:
- Running or phantom flushing toilet
- Slow drain that just needs a quick snake
- Dripping faucet or showerhead
- Leaking angle stop or shutoff valve
- Loose toilet seat or wobbly fixture
- Garbage disposal not working
If we’re already at your house, the trip is paid for. The cost of fixing a $15 fill valve while we’re there is just the part plus a few minutes of labor. If we have to come back for it later, you pay another trip charge.
When you call to schedule a job, mention the secondary issues too. We can bring the right parts and budget the time for both.
Garbage Disposal: Lifespan and Replacement Indicators
For reference, when to repair vs. replace a disposal:
Repair if:
- Disposal is under 7–8 years old
- The issue is just the reset button tripped (easy fix)
- It’s stuck but can be freed with the hex wrench in the bottom slot
Replace if:
- Disposal is 10+ years old AND having problems
- Motor hums but doesn’t turn (usually means motor burned out)
- Leaking from the body of the unit (not just a connection)
- Constantly clogging despite normal use
- Making loud grinding noises that weren’t there before
Standard 1/2 HP units run $100–$200 for the unit itself. Installation is typically $100–$200 of labor if the mounting system is compatible.
A Word From Don
Two-fer service calls like this Alvarado job are some of my favorites — we get to fix two annoying problems in one trip and the customer saves on a second trip charge. If you’ve got more than one plumbing issue, mention them when you call. We can usually handle multiple small repairs in a single visit.
— Don, Dependable Plumbing · Garbage disposal service · Plumber in Alvarado, TX
Need a plumber? Call Don.
Same-day service on most plumbing calls · Licensed Plumber
817-447-2654